App:Library:LVGL:docs:Get started
https://docs.lvgl.io/8.2/get-started/index.html
Quick overview
英文 自動翻訳 Here you can learn the most important things about LVGL. You should read this first to get a general impression and read the detailed Porting and Overview sections after that.
ここでは、LVGLについて最も重要なことを学ぶことができます。
Get started in a simulator
英文 自動翻訳 Instead of porting LVGL to embedded hardware straight away, it's highly recommended to get started in a simulator first.
LVGL is ported to many IDEs to be sure you will find your favorite one. Go to the Simulators section to get ready-to-use projects that can be run on your PC.This way you can save the time of porting for now and get some experience with LVGL immediately.
LVGLを組み込みハードウェアにすぐに移植するのではなく、最初にシミュレーターで開始することを強くお勧めします。
LVGLは多くのIDEに移植されており、お気に入りのIDEを確実に見つけることができます。シミュレーターセクションに移動して、PCで実行できるすぐに使用できるプロジェクトを入手します。このようにして、今のところ移植の時間を節約し、LVGLの経験をすぐに得ることができます。
Add LVGL into your project
英文 自動翻訳 If you would rather try LVGL on your own project follow these steps: - Download or clone the library from GitHub with
git clone https://github.com/lvgl/lvgl.git. - Copy the
lvglfolder into your project. - Copy
lvgl/lv_conf_template.haslv_conf.hnext to thelvglfolder, change the first#if 0to1to enable the file's content and set theLV_COLOR_DEPTHdefines. - Include
lvgl/lvgl.hin files where you need to use LVGL related functions. - Call
lv_tick_inc(x)everyxmilliseconds in a Timer or Task (xshould be between 1 and 10). It is required for the internal timing of LVGL. Alternatively, configureLV_TICK_CUSTOM(seelv_conf.h) so that LVGL can retrieve the current time directly. - Call
lv_init() - Create a draw buffer: LVGL will render the graphics here first, and send the rendered image to the display. The buffer size can be set freely but 1/10 screen size is a good starting point.
 static lv_disp_draw_buf_t draw_buf;
 static lv_color_t buf1[DISP_HOR_RES * DISP_VER_RES / 10];                        /*Declare a buffer for 1/10 screen size*/
lv_disp_draw_buf_init(&draw_buf, buf1, NULL, MY_DISP_HOR_RES * MY_DISP_VER_SER / 10); /*Initialize the display buffer.*/
- Implement and register a function which can copy the rendered image to an area of your display:
 static lv_disp_drv_t disp_drv;        /*Descriptor of a display driver*/
 lv_disp_drv_init(&disp_drv);          /*Basic initialization*/
 disp_drv.flush_cb = my_disp_flush;    /*Set your driver function*/
 disp_drv.draw_buf = &draw_buf;        /*Assign the buffer to the display*/
 disp_drv.hor_res = MY_DISP_HOR_RES;   /*Set the horizontal resolution of the display*/
 disp_drv.ver_res = MY_DISP_VER_RES;   /*Set the vertical resolution of the display*/
 lv_disp_drv_register(&disp_drv);      /*Finally register the driver*/

 void my_disp_flush(lv_disp_drv_t * disp, const lv_area_t * area, lv_color_t * color_p)
 {
     int32_t x, y;
     /*It's a very slow but simple implementation.
      *`set_pixel` needs to be written by you to a set pixel on the screen*/
     for(y = area->y1; y <= area->y2; y++) {
         for(x = area->x1; x <= area->x2; x++) {
             set_pixel(x, y, *color_p);
             color_p++;
         }
     }

     lv_disp_flush_ready(disp);         /* Indicate you are ready with the flushing*/
 }
- Implement and register a function which can read an input device. E.g. for a touchpad:
 static lv_indev_drv_t indev_drv;           /*Descriptor of a input device driver*/
 lv_indev_drv_init(&indev_drv);             /*Basic initialization*/
 indev_drv.type = LV_INDEV_TYPE_POINTER;    /*Touch pad is a pointer-like device*/
 indev_drv.read_cb = my_touchpad_read;      /*Set your driver function*/
 lv_indev_drv_register(&indev_drv);         /*Finally register the driver*/

 void my_touchpad_read(lv_indev_t * indev, lv_indev_data_t * data)
 {
     /*`touchpad_is_pressed` and `touchpad_get_xy` needs to be implemented by you*/
     if(touchpad_is_pressed()) {
       data->state = LV_INDEV_STATE_PRESSED;
       touchpad_get_xy(&data->point.x, &data->point.y);
     } else {
       data->state = LV_INDEV_STATE_RELEASED;
     }
 }
- Call
lv_timer_handler()periodically every few milliseconds in the mainwhile(1)loop or in an operating system task. It will redraw the screen if required, handle input devices, animation etc.
For a more detailed guide go to the Porting section.自分のプロジェクトでLVGLを試してみたい場合は、次の手順に従ってください。 - GitHubの
git clone https://github.com/lvgl/lvgl.gitからライブラリをダウンロードまたはクローンします。 - 自分のプロジェクトでLVGLを試してみたい場合は、次の手順に従ってください。
lvglフォルダをプロジェクトにコピーします。 lvglフォルダの横にあるlvgl/lv_conf_template.hをlv_conf.hとしてコピーし、最初の#if 0を1に変更してファイルのコンテンツを有効にし、定義LV_COLOR_DEPTHを設定します。- LVGL関連の機能を使用する必要があるファイルに
lvgl/lvgl.hを include します。 - タイマーまたはタスクで
xミリ秒ごとにlv_tick_inc(x)を呼び出します(xは1から10の間である必要があります)。LVGLの内部タイミングに必要です。または、 LVGLが現在の時刻を直接取得できるようにLV_TICK_CUSTOMを構成します(lv_conf.hを参照)。 lv_init()を呼び出す- 描画バッファを作成します。LVGLは最初にここでグラフィックをレンダリングし、レンダリングされた画像をディスプレイに送信します。バッファサイズは自由に設定できますが、画面サイズの1/10が開始点として適しています。
 static lv_disp_draw_buf_t draw_buf;
 static lv_color_t buf1 [DISP_HOR_RES * DISP_VER_RES / 10]; /*1/10画面サイズのバッファを宣言します*/
 lv_disp_draw_buf_init(&draw_buf、buf1、NULL、MY_DISP_HOR_RES * MY_DISP_VER_SER / 10); /*表示バッファを初期化します。*/
- レンダリングされた画像をディスプレイの領域にコピーできる関数を実装して登録します。
 static lv_disp_drv_t disp_drv; /*ディスプレイドライバの記述子*/
 lv_disp_drv_init(&disp_drv); /*基本的な初期化*/
 disp_drv.flush_cb = my_disp_flush; /*ドライバー機能を設定します*/
 disp_drv.draw_buf =&draw_buf; /*バッファをディスプレイに割り当てます*/
 disp_drv.hor_res = MY_DISP_HOR_RES; /*ディスプレイの水平解像度を設定します*/
 disp_drv.ver_res = MY_DISP_VER_RES; /*ディスプレイの垂直解像度を設定します*/
 lv_disp_drv_register(&disp_drv); /*最後にドライバーを登録します*/

 void my_disp_flush(lv_disp_drv_t * disp、const lv_area_t * area、lv_color_t * color_p)
 {
     int32_t x、y;
     / *これは非常に遅いですが、単純な実装です。
      *`set_pixel`は画面上の設定されたピクセルに書き込む必要があります*/
     for(y = area-> y1; y <= area-> y2; y ++){
         for(x = area-> x1; x <= area-> x2; x ++){
             set_pixel(x、y、* color_p);
             color_p ++;
         }
     }

     lv_disp_flush_ready(disp); /*フラッシングの準備ができていることを示します*/
 }
- 入力デバイスを読み取ることができる関数を実装して登録します。タッチパッドの例:
 static lv_indev_drv_t indev_drv; /*入力デバイスドライバーの記述子*/
 lv_indev_drv_init(&indev_drv); /*基本的な初期化*/
 indev_drv.type = LV_INDEV_TYPE_POINTER; /*タッチパッドはポインタのようなデバイスです*/
 indev_drv.read_cb = my_touchpad_read; /*ドライバー機能を設定します*/
 lv_indev_drv_register(&indev_drv); /*最後にドライバーを登録します*/

 void my_touchpad_read(lv_indev_t * indev、lv_indev_data_t * data)
 {
     /*`touchpad_is_pressed`と`touchpad_get_xy`はあなたが実装する必要があります*/
     if(touchpad_is_pressed()){
       data-> state = LV_INDEV_STATE_PRESSED;
       touchpad_get_xy(&data-> point.x、&data-> point.y);
     } そうしないと {
       data-> state = LV_INDEV_STATE_RELEASED;
     }
 }
- メインループ
while(1)またはオペレーティングシステムタスクで、数ミリ秒ごとに定期的にlv_timer_handler()を呼び出します。必要に応じて画面を再描画し、入力デバイス、アニメーションなどを処理します。
より詳細なガイドについては、移植のセクションを参照してください。- Download or clone the library from GitHub with
Learn the basics
英文 自動翻訳 Widgets
The graphical elements like Buttons, Labels, Sliders, Charts etc. are called objects or widgets. Go to Widgets to see the full list of available widgets.
Every object has a parent object where it is created. For example, if a label is created on a button, the button is the parent of label.
The child object moves with the parent and if the parent is deleted the children will be deleted too.
Children can be visible only within their parent's bounding area. In other words, the parts of the children outside the parent are clipped.
A Screen is the "root" parent. You can have any number of screens.
To get the current screen call
lv_scr_act(), and to load a screen uselv_scr_load(scr1).
You can create a new object withlv_<type>_create(parent).It will return an
lv_obj_t *variable that can be used as a reference to the object to set its parameters.For example:
lv_obj_t * slider1 = lv_slider_create(lv_scr_act());
To set some basic attributeslv_obj_set_<parameter_name>(obj, <value>)functions can be used.For example:
 lv_obj_set_x(btn1, 30);
 lv_obj_set_y(btn1, 10);
 lv_obj_set_size(btn1, 200, 50);
Along with the basic attributes, widgets can have type specific parameters which are set bylv_<widget_type>_set_<parameter_name>(obj, <value>)functions. For example:lv_slider_set_value(slider1, 70, LV_ANIM_ON);
To see the full API visit the documentation of the widgets or the related header file (e.g. lvgl/src/widgets/lv_slider.h).Widgets ボタン、ラベル、スライダー、チャートなどのグラフィック要素は、オブジェクトまたはウィジェットと呼ばれます。ウィジェットに移動して、使用可能なウィジェットの完全なリストを確認してください。
すべてのオブジェクトには、それが作成される親オブジェクトがあります。たとえば、ボタンにラベルが作成されている場合、そのボタンはラベルの親です。
子オブジェクトは親と一緒に移動し、親が削除されると子も削除されます。
子は、親の境界領域内でのみ表示できます。つまり、親の外側の子の部分がクリップされます。
画面は「ルート」の親です。画面はいくつでも構いません。
現在の画面を得るにはlv_scr_act()を呼び出し、画面をロードするには、lv_scr_load(scr1)を使用します。
lv_<type>_create(parent)を使用して新しいオブジェクトを作成できます。パラメータを設定するためのオブジェクトへの参照として使用できる変数
lv_obj_t *を返します。例えば:
lv_obj_t * slide1 = lv_slider_create(lv_scr_act());
いくつかの基本的な属性を設定するには、関数
lv_obj_set_<parameter_name>(obj, <value>)を使用できます。例えば:
 lv_obj_set_x(btn1、30);
 lv_obj_set_y(btn1、10);
 lv_obj_set_size(btn1、200、50);
基本的な属性に加えて、ウィジェットは関数lv_<widget_type>_set_<parameter_name>(obj, <value>)によって設定されるタイプ固有のパラメーターを持つことができます。例えば:
lv_slider_set_value(slider1、70、LV_ANIM_ON);
完全なAPIを確認するには、ウィジェットのドキュメントまたは関連するヘッダーファイル(例:lvgl / src / widgets / lv_slider.h)にアクセスしてください。Events
Events are used to inform the user that something has happened with an object. You can assign one or more callbacks to an object which will be called if the object is clicked, released, dragged, being deleted, etc.
A callback is assigned like this:
 lv_obj_add_event_cb(btn, btn_event_cb, LV_EVENT_CLICKED, NULL); /*Assign a callback to the button*/

 ...

 void btn_event_cb(lv_event_t * e)
 {
     printf("Clicked\n");
 }
LV_EVENT_ALLcan be used instead ofLV_EVENT_CLICKEDto invoke the callback for any event.From
lv_event_t * ethe current event code can be retrieved with:lv_event_code_t code = lv_event_get_code(e);
The object that triggered the event can be retrieved with:
lv_obj_t * obj = lv_event_get_target(e);
To learn all features of the events go to the Event overview section.
Events イベントは、オブジェクトで何かが発生したことをユーザーに通知するために使用されます。オブジェクトがクリック、リリース、ドラッグ、削除などされた場合に呼び出される1つ以上のコールバックをオブジェクトに割り当てることができます。
コールバックは次のように割り当てられます。
 lv_obj_add_event_cb(btn、btn_event_cb、LV_EVENT_CLICKED、NULL); /*ボタンにコールバックを割り当てます*/

 ...

 void btn_event_cb(lv_event_t * e)
 {
     printf("クリック\n");
 }
LV_EVENT_ALLは任意のイベントのコールバックを呼び出す代わりにLV_EVENT_CLICKEDを使用できます。lv_event_t * eを使う事で、現在のイベントコードから、次のコマンドで取得できます。lv_event_code_t code = lv_event_get_code(e);
イベントをトリガーしたオブジェクトは、次の方法で取得できます。
lv_obj_t * obj = lv_event_get_target(e);
イベントのすべての機能については、「イベントの概要」セクションにアクセスしてください。
Parts
Widgets might be built from one or more parts. For example, a button has only one part called
LV_PART_MAIN.
However, a Slider hasLV_PART_MAIN,LV_PART_INDICATORandLV_PART_KNOB.By using parts you can apply different styles to sub-elements of a widget. (See below)
Read the widgets' documentation to learn which parts each uses.Parts ウィジェットは、1つ以上のパーツから構築される場合があります。たとえば、ボタンには
LV_PART_MAINと呼ばれる部分が1つだけあります。
ただし、スライダーにはLV_PART_MAIN,LV_PART_INDICATOR,LV_PART_KNOBがあります。
パーツを使用することで、ウィジェット(widget)のサブ要素(sub-elements)にさまざまなスタイルを適用できます。(下記参照)
ウィジェット(widget)のドキュメントを読んで、それぞれが使用するパーツを確認してください。States
LVGL objects can be in a combination of the following states:
LV_STATE_DEFAULTNormal, released stateLV_STATE_CHECKEDToggled or checked stateLV_STATE_FOCUSEDFocused via keypad or encoder or clicked via touchpad/mouseLV_STATE_FOCUS_KEYFocused via keypad or encoder but not via touchpad/mouseLV_STATE_EDITEDEdit by an encoderLV_STATE_HOVEREDHovered by mouse (not supported now)LV_STATE_PRESSEDBeing pressedLV_STATE_SCROLLEDBeing scrolledLV_STATE_DISABLEDDisabled
For example, if you press an object it will automatically go to theLV_STATE_FOCUSEDandLV_STATE_PRESSEDstates and when you release it theLV_STATE_PRESSEDstate will be removed while focus remains active.
To check if an object is in a given state uselv_obj_has_state(obj, LV_STATE_...).
It will returntrueif the object is currently in that state.To manually add or remove states use:
 lv_obj_add_state(obj, LV_STATE_...);
 lv_obj_clear_state(obj, LV_STATE_...);
States LVGLオブジェクトは、次のステータスの組み合わせにすることができます。
LV_STATE_DEFAULT通常のリリース状態LV_STATE_CHECKEDトグルまたはチェック状態LV_STATE_FOCUSEDキーパッドまたはエンコーダーを介してフォーカスされるか、タッチパッド/マウスを介してクリックされますLV_STATE_FOCUS_KEYキーパッドまたはエンコーダーを介して焦点を合わせますが、タッチパッド/マウスを介して焦点を合わせませんLV_STATE_EDITEDエンコーダーによる編集LV_STATE_HOVEREDマウスでホバーした(現在はサポートされていません)LV_STATE_PRESSED押されているLV_STATE_SCROLLEDスクロールされているLV_STATE_DISABLED無効化されている
たとえば、オブジェクトを押すと、自動的にLV_STATE_FOCUSEDとLV_STATE_PRESSEDのステータスになり、離すとフォーカスがアクティブなまま
LV_STATE_PRESSEDのステータスが削除されます。
オブジェクトが特定のステータスにあるかどうかを確認するにはlv_obj_has_state(obj, LV_STATE_...)を使用します。
オブジェクトが現在そのステータスにある場合trueが返されます。
ステータスを手動で追加または削除するには、次を使用します。lv_obj_add_state(obj、LV_STATE _...); lv_obj_clear_state(obj、LV_STATE _...);
Styles
A style instance contains properties such as background color, border width, font, etc. that describe the appearance of objects.
Styles are represented with
lv_style_tvariables.Only their pointer is saved in the objects so they need to be defined as static or global.
Before using a style it needs to be initialized with
lv_style_init(&style1).After that, properties can be added to configure the style.
For example:static lv_style_t style1; lv_style_init(&style1); lv_style_set_bg_color(&style1, lv_color_hex(0xa03080)) lv_style_set_border_width(&style1, 2))
See the full list of properties here.
Styles are assigned using the ORed combination of an object's part and state.
For example to use this style on the slider's indicator when the slider is pressed:
lv_obj_add_style(slider1, &style1, LV_PART_INDICATOR | LV_STATE_PRESSED);
If the part is
LV_PART_MAINit can be omitted:lv_obj_add_style(btn1, &style1, LV_STATE_PRESSED); /*Equal to LV_PART_MAIN | LV_STATE_PRESSED*/
Similarly,
LV_STATE_DEFAULTcan be omitted too:lv_obj_add_style(slider1, &style1, LV_PART_INDICATOR); /*Equal to LV_PART_INDICATOR | LV_STATE_DEFAULT*/
For
LV_STATE_DEFAULTandLV_PART_MAINsimply write0:lv_obj_add_style(btn1, &style1, 0); /*Equal to LV_PART_MAIN | LV_STATE_DEFAULT*/
Styles can be cascaded (similarly to CSS).
It means you can add more styles to a part of an object.
For example
style_btncan set a default button appearance, andstyle_btn_redcan overwrite the background color to make the button red:lv_obj_add_style(btn1, &style_btn, 0); lv_obj_add_style(btn1, &style1_btn_red, 0);
If a property is not set on for the current state, the style with
LV_STATE_DEFAULTwill be used.A default value is used if the property is not defined in the default state.
Some properties (typically the text-related ones) can be inherited.This means if a property is not set in an object it will be searched for in its parents too.
For example, you can set the font once in the screen's style and all text on that screen will inherit it by default.
Local style properties also can be added to objects.This creates a style which resides inside the object and is used only by the object:
lv_obj_set_style_bg_color(slider1, lv_color_hex(0x2080bb), LV_PART_INDICATOR | LV_STATE_PRESSED);
To learn all the features of styles see the Style overview section.
Styles スタイルインスタンスには、オブジェクトの外観を説明する背景色、境界線の幅、フォントなどのプロパティが含まれています。
スタイルは変数
lv_style_tで表されます。それらのポインタのみがオブジェクトに保存されるため、static または global として定義する必要があります。
スタイルを使用する前に、
lv_style_init(&style1)で初期化する必要がありますその後、プロパティを追加してスタイルを構成できます。
例えば:static lv_style_t style1; lv_style_init(&style1); lv_style_set_bg_color(&style1、lv_color_hex(0xa03080)) lv_style_set_border_width(&style1、2))
ここでプロパティの完全なリストを参照してください。
スタイルは、オブジェクトのパーツと状態のOR演算された組み合わせを使用して割り当てられます。
たとえば、スライダーが押されたときにスライダーのインジケーターでこのスタイルを使用するには、次のようにします:
lv_obj_add_style(slider1、&style1、LV_PART_INDICATOR | LV_STATE_PRESSED);
パーツが
LV_PART_MAINの場合、省略できます。lv_obj_add_style(btn1、&style1、LV_STATE_PRESSED); /*LV_PART_MAINに等しい| LV_STATE_PRESSED * /
同様に、
LV_STATE_DEFAULTも省略できます。lv_obj_add_style(slider1、&style1、LV_PART_INDICATOR); /*LV_PART_INDICATORに等しい| LV_STATE_DEFAULT * /
LV_STATE_DEFAULTとLV_PART_MAINには単純に0と書きます:lv_obj_add_style(btn1、&style1、0); /*LV_PART_MAINに等しい| LV_STATE_DEFAULT * /
スタイルは(CSSと同様に)つなぐ事ができます。
これは、オブジェクトの一部にさらにスタイルを追加できることを意味します。
たとえば
style_btnによりデフォルトのボタンの外観を設定したり、style_btn_redにより背景色を上書きしてボタンを赤にすることができます。lv_obj_add_style(btn1、&style_btn、0); lv_obj_add_style(btn1、&style1_btn_red、0);
現在の状態に対してプロパティが設定されていない場合、
LV_STATE_DEFAULTのスタイルが使用されます。プロパティがデフォルト状態のままで定義されていない場合は、デフォルト値が使用されます。
一部のプロパティ(通常はテキスト関連のプロパティ)を継承できます。これは、プロパティがオブジェクトに設定されていない場合、その親でも検索されることを意味します。
たとえば、画面のスタイルでフォントを1回設定すると、その画面上のすべてのテキストがデフォルトでフォントを継承します。
ローカルスタイルのプロパティをオブジェクトに追加することもできます。これにより、オブジェクト内に存在し、オブジェクトによってのみ使用されるスタイルが作成されます。
lv_obj_set_style_bg_color(slider1、lv_color_hex(0x2080bb)、LV_PART_INDICATOR | LV_STATE_PRESSED);
スタイルのすべての機能については、section ”Style overview" を参照してください。
Themes
Themes are the default styles for objects.
Styles from a theme are applied automatically when objects are created.
The theme for your application is a compile time configuration set in
lv_conf.h.Themes テーマとは、オブジェクトのデフォルトのスタイルの事です。
オブジェクトが作っれた時、テーマによりスタイルは自動的に適用されます。
アプリケーションのテーマは
lv_conf.hの中に設定されている conpile time configuration です。
Examples
英文 自動翻訳 A button with a label and react on click event
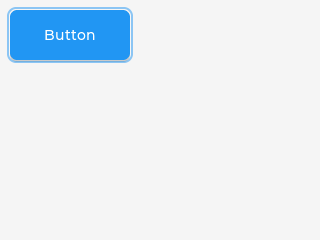
ラベルが付いたボタン クリックイベントに反応します
Create styles from scratch for buttons
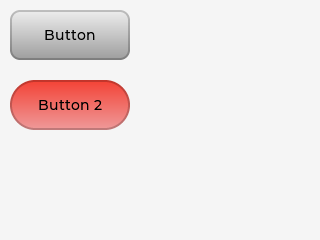
ボタンのスタイルを最初から作成する Create a slider and write its value on a label
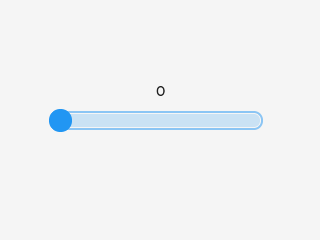
スライダーを作成し、その値をラベルに書き込みます Micropython
Learn more about Micropython.
# Create a Button and a Label scr = lv.obj() btn = lv.btn(scr) btn.align(lv.scr_act(), lv.ALIGN.CENTER, 0, 0) label = lv.label(btn) label.set_text("Button") # Load the screen lv.scr_load(scr)
Micropython Micropythonの詳細をご覧ください。